Set up Environment Options in Visual Cafe
(Step 1)
The goal of this step is to set up the environment needed for next steps.
- Start Visual cafe program and close all internal frame.
- Open the "Tools" menu in the tool bar, then click on the Environment
Options menu item. An "Environment Options" dialog will appear.
- In General tab panel (default), check Do nothing on
Startup and leave other fields as default.
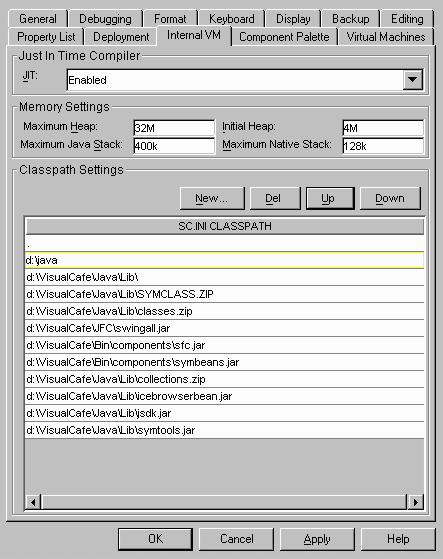
- Click Internal VM tab on the top. Push New... button in
the middle of dialog to open a file chooser to select the directory
that contains the custom JavaBeans package directory (such as cdev,
adm or sdm) for the class path. This directory will show up on the
second line of SC.INI.CLASSPATH list (Fig. 1).
If it is not on the second line, use the Up button to move up.
- Click OK button to set up the class path.
- You must exit and restart visual cafť to take effective the change.
|
|---|
|
Fig. 1 |
|---|
* d:\java directory contains cdev, adm and sdm packages.